Wood is an outstanding building material and can be used for a variety of projects. With its versatility comes a unique set of challenges when coating the substrate. Preparing bare wood for painting or staining correctly, is a must to ensure a beautiful long lasting finish. Wood knots, moisture & sap bleeding will affect the coating if not prepared properly.
When painting any substrate, we must always begin with a clean, dirt and grease free surface. If there is mould, dirt, grease or anything else present, we must remove and clean it before we can begin applying any type of coating.
Moisture Content
When coating bare wood, first things first, we must check its moisture content. Coating wood with high moisture levels will result in product failure; loss of adhesion. If you do not have one already, a moisture meter is a good investment to make, especially for a painting contractor. It will cost you more in the end to have to return the following year and deal with a coating issue. Typically, exterior wood surfaces should not have more than 15-20% moisture present prior to painting & 12-15% for interior surfaces.
Visiting from Canada🇨🇦?
Get Benjamin Moore Paints delivered right to your door.
Shop Now
Priming Bare Wood
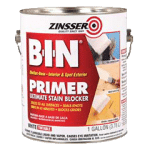
If you are deciding to paint bare wood, you should seal all knots (spot prime) with a shellac based primer. Shellac based primers are great for sealing wood knots and sap streaks. They do carry a pungent odour, but dry very quickly and will not let the knot bleed through the top (finish) coat. If you are looking to stain your bare wood, you don’t not have to seal the knots with a primer, heavily saturating the knots with stain will do.
Removing all dried up and oozing sap is a must, especially when dealing with woods such as fir or pine. After removing the sap build up, use an appropriate primer/sealer to seal in the sap affected areas.

Shellac-Base Primer
Filling in the Holes
Finally, it is time to fill in the holes and cracks and begin sanding. Use an interior or exterior grade wood filler, when filling in holes and cracks. I would recommend using a higher grade wood filler as they tend to shrink and crack a lot less. When it comes to sanding, stick with 150g – 220g sand paper. All sanding should be performed in the direction of the wood grain. Sanding across the grain will create scratches that will absorb stain and polyurethane unevenly.
Preparing your bare wood surface correctly, will allow your coating to penetrate and adhere properly. Your new wood surface will last for many years to come!
Billy Petrovski
Creative Director
The Paint People


